Showing posts with label Unit 30 Camera and Lighting Techniques for Moving Image Production. Show all posts
Showing posts with label Unit 30 Camera and Lighting Techniques for Moving Image Production. Show all posts
Tuesday, 24 May 2016

Wednesday, 9 December 2015
Evaluation
When it came to starting my New Wave film, I wrote up an initial design brief which can be found here http://kechncjakobmorrison.blogspot.co.uk/2015/11/new-wave-brief.html The subject matter didn't particularly matter for my new wave film, it was mainly the locations, so for this I planned ahead and had a look at some places to film in Birmingham and Manchester, my planning for this can be found here http://kechncjakobmorrison.blogspot.co.uk/2015/12/new-wave-planning.html
When deciding what to actually produce as part of my new wave film, my contextual study of the American new wave was a big influence on me especially Easy Rider with it's use of jump cuts and drug use.


The Graduate and Midnight cowboy also inspired me to include transportation within my new wave film as they both use buses to show that the characters are moving on with their lives, because of this I decided to use footage on a bus journey at the start of my film, about half way through and at the very end. I decided these journey's such happen at different times of the day and as such the footage from the start of the film was shot in the morning, the footage from the middle of the film was shot in the afternoon and the footage used at the end of the film was shot at night.
My final piece produced was a statement on the idea that the majority of the youth in today's society is more interested in what they know and not particularly expanding their horizons. The idea from this came about from the general feeling of Benjamin Braddock in The Graduate, he does not know what he wants to do with his future but he doesn't just want to rush into it and as such spends the majority of the film doing absolutely nothing just as the subjects do in my film. The idea behind layering images of art galleries and other established locations over the top of my main footage was to get across the idea that even though the subjects do not particularly want to progress with their lives there is this overwhelming sense that they must do something important with their lives. I felt like art galleries and museums were the perfect locations for this due to the fact they are literally monuments to people's life work. I have also included a few images that are visible for a few frames that include phrases such as 'random movement', 'little things mean a lot' and 'do not open' The idea behind this is that they are passing thoughts of the youth today, or at least myself. The film is very much a reflection of my life and the general feelings felt by the 1960's youth of America, they wanted their future to be different but didn't know how to go about this. The film attempts to depict my outlook on life in that as much as I want myself to be known to the world, symbolised by the art galleries, I am unsure of how to do this, as shown by the words 'random movement' I feel as if anything I do with my life will be a random stab in the dark.
Having done my initial camera and lighting tests I had better knowledge of ISO, aperture and shutter speed, I tried to incorporate this into my new wave film as much as possible but I intended for the majority of my filming to be done with natural lighting and so the majority of the time I only needed to adjust my aperture slightly each time just to make sure the footage produced was neither over or under exposed. The majority of filming done used a hand held camera, this is a common technique used within new wave films and I also felt that it would work well within established locations, it is meant to symbolise the idea that to become a well-known person I would have to take a much more hands on approach. This is opposed by the shots within the bedroom, the majority of the filming here was done by a static camera and I tended to just set up the camera and let it record, this was to symbolise the laissez-faire approach I have to life in general. The editing is jumpy and erratic as early new wave films were but it also has somewhat of a deeper meaning. The film is really a reflection of what's going on in my head, I can never really focus on one thing and my mind is constantly switching between ideas, I constantly worry that I will make nothing of my life but at the same time take no action against this.
Editing for my new wave film was very sporadic and every cut used was a jump cut, the jump cuts enable a quick change of scenery, something the french new wave films were renowned for when they first arrived on the scene. At other times, I used jump cuts to show the same scene but characters in slightly different positions to show that although these people have lives and do activities from time to time, they aren't exactly very exciting and not really worthing of watching, a jump cut was used to fast forward through this group of people's lives. Due to the fact that I filmed a lot of footage for my new wave film when it came to editing I had a lot to sort through so I found sorting them at first into relevant folders as I had captured a lot of video as well as photography really helped.


When filming my main challenge was that I felt I did not film at enough different established locations, I tried to overcome this by getting a lot of filming done at the locations I could visit such as the Manchester Art Gallery and Birmingham Museum and Art Gallery. I ended up having about 3 hours of footage for me to edit together to produce my final piece. this however was another one of the challenges I faced, I ended up filming far too much and didn't allow myself enough time to sift through the hours of footage to find specific shots that I wanted to use. If I was to improve upon my new wave film I would definitely plan my filming a lot better and shoot at more locations as I only used about 6 locations for filming. Also if I organised myself better and had better planning I would have had more time to watch through the footage and select key clips from my footage to use. As with all my work my organisation skills are what let me down and as such if I were to re-do my new wave film I would plan ahead in much more detail and I feel this would have allowed me to produce a much better film.
When deciding what to actually produce as part of my new wave film, my contextual study of the American new wave was a big influence on me especially Easy Rider with it's use of jump cuts and drug use.


The Graduate and Midnight cowboy also inspired me to include transportation within my new wave film as they both use buses to show that the characters are moving on with their lives, because of this I decided to use footage on a bus journey at the start of my film, about half way through and at the very end. I decided these journey's such happen at different times of the day and as such the footage from the start of the film was shot in the morning, the footage from the middle of the film was shot in the afternoon and the footage used at the end of the film was shot at night.
My final piece produced was a statement on the idea that the majority of the youth in today's society is more interested in what they know and not particularly expanding their horizons. The idea from this came about from the general feeling of Benjamin Braddock in The Graduate, he does not know what he wants to do with his future but he doesn't just want to rush into it and as such spends the majority of the film doing absolutely nothing just as the subjects do in my film. The idea behind layering images of art galleries and other established locations over the top of my main footage was to get across the idea that even though the subjects do not particularly want to progress with their lives there is this overwhelming sense that they must do something important with their lives. I felt like art galleries and museums were the perfect locations for this due to the fact they are literally monuments to people's life work. I have also included a few images that are visible for a few frames that include phrases such as 'random movement', 'little things mean a lot' and 'do not open' The idea behind this is that they are passing thoughts of the youth today, or at least myself. The film is very much a reflection of my life and the general feelings felt by the 1960's youth of America, they wanted their future to be different but didn't know how to go about this. The film attempts to depict my outlook on life in that as much as I want myself to be known to the world, symbolised by the art galleries, I am unsure of how to do this, as shown by the words 'random movement' I feel as if anything I do with my life will be a random stab in the dark.
Having done my initial camera and lighting tests I had better knowledge of ISO, aperture and shutter speed, I tried to incorporate this into my new wave film as much as possible but I intended for the majority of my filming to be done with natural lighting and so the majority of the time I only needed to adjust my aperture slightly each time just to make sure the footage produced was neither over or under exposed. The majority of filming done used a hand held camera, this is a common technique used within new wave films and I also felt that it would work well within established locations, it is meant to symbolise the idea that to become a well-known person I would have to take a much more hands on approach. This is opposed by the shots within the bedroom, the majority of the filming here was done by a static camera and I tended to just set up the camera and let it record, this was to symbolise the laissez-faire approach I have to life in general. The editing is jumpy and erratic as early new wave films were but it also has somewhat of a deeper meaning. The film is really a reflection of what's going on in my head, I can never really focus on one thing and my mind is constantly switching between ideas, I constantly worry that I will make nothing of my life but at the same time take no action against this.
Editing for my new wave film was very sporadic and every cut used was a jump cut, the jump cuts enable a quick change of scenery, something the french new wave films were renowned for when they first arrived on the scene. At other times, I used jump cuts to show the same scene but characters in slightly different positions to show that although these people have lives and do activities from time to time, they aren't exactly very exciting and not really worthing of watching, a jump cut was used to fast forward through this group of people's lives. Due to the fact that I filmed a lot of footage for my new wave film when it came to editing I had a lot to sort through so I found sorting them at first into relevant folders as I had captured a lot of video as well as photography really helped.

After sorting through the file types, I then went through my footage and named them small signifier as to what happened in each shot, for example 'Book Band Practice' is footage of two of the people discussing their band and how band practice needs to rebooked, these titles made it far easier to edit my clips as just having a few words describing each shot was all I needed to know what i had filmed.

When filming my main challenge was that I felt I did not film at enough different established locations, I tried to overcome this by getting a lot of filming done at the locations I could visit such as the Manchester Art Gallery and Birmingham Museum and Art Gallery. I ended up having about 3 hours of footage for me to edit together to produce my final piece. this however was another one of the challenges I faced, I ended up filming far too much and didn't allow myself enough time to sift through the hours of footage to find specific shots that I wanted to use. If I was to improve upon my new wave film I would definitely plan my filming a lot better and shoot at more locations as I only used about 6 locations for filming. Also if I organised myself better and had better planning I would have had more time to watch through the footage and select key clips from my footage to use. As with all my work my organisation skills are what let me down and as such if I were to re-do my new wave film I would plan ahead in much more detail and I feel this would have allowed me to produce a much better film.
Planning
For my New Wave film the most important aspect to plan is the locations that I will be using, here are some of the locations that I plan on visiting:
The Manchester Art Gallery and surrounding streets

Birmingham Art Gallery and Victoria Square
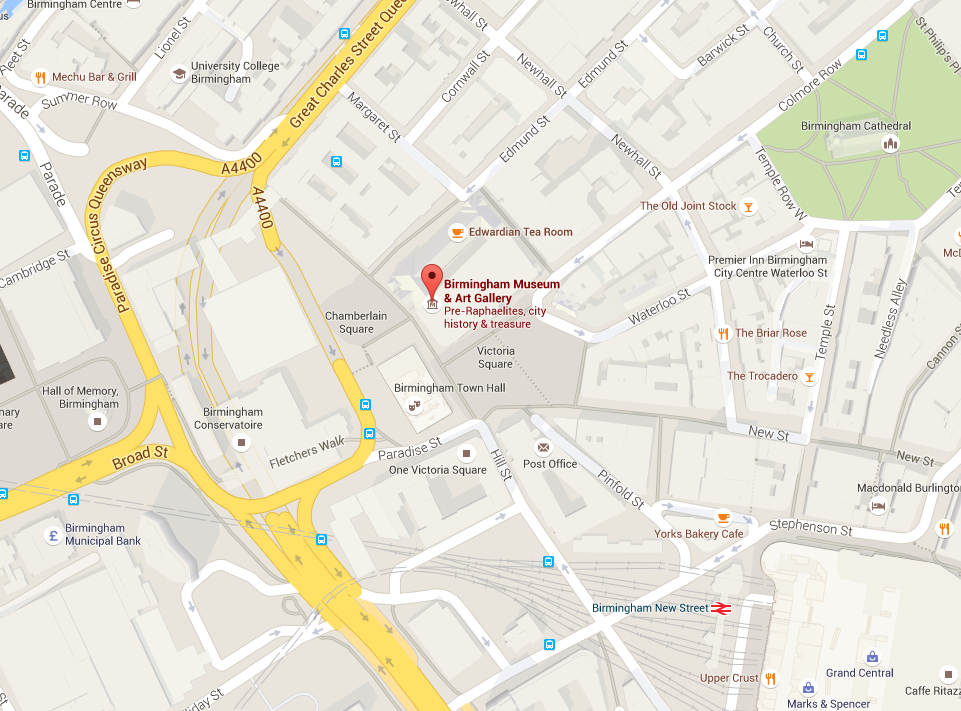
Again I will be filming here as I want to have established locations layered over the top of my other footage, I will also be filming in Victoria Square as the German christmas market is currently being held there, this is quite an established location and so I wish to make use of it whilst I can.
The Custard Factory's surrounding area

I will be filming around The Custard Factory as I have previously visited here and felt like the area's grittiness would work well within my New Wave film as a juxtaposition to established locations like art galleries. The walls are filled with artistic graffiti and I feel like graffiti is one of the key ways of displaying the counter culture movement within today's society.
Whitworth Art Gallery

I will also be filming at the Whitworth Art Gallery as again I feel like this is an established art gallery that will work for layering over the top of my other footage
My bedroom

The majority of filming will be done within my bedroom, this will be my my main footage which will then have other footage from the locations discussed above layered over the top. I will be using two different layouts of the same bedroom to add to the general eccentricity of the film.
UPDATE:
After filming one layout of the bedroom I realised that I did not have much usable footage and so planned to get more filming done using the second layout. This can be clearly seen within my final piece as the majority of action takes place in my bedroom with the second layout.
After visiting Manchester I also realised that the handheld footage would work really well within my film and as such decided to do the same thing when visiting the Birmingham Museum and Art Gallery. I also decided to not get as much filming done in Birmingham because by this point I already had well over 3 hours of footage for me to edit and I didn't have much time left, this was down to my organisation skills, or lack of. I decided that it would be best to get a bit of filming done here but only about half an hour as I already had plenty of footage from both Whitworth Art Gallery and Manchester Art Gallery and the location itself was not important but merely the concept behind becoming established and having a living monument long after you are gone.
After filming about half of my overall footage I realised that I had planned to get far too much and the footage I had already captured would be enough to produce a new wave film like I had intended and so decided that any filming I did from then on would be a lot more particular than before so I would not have as much to edit. My main problem was that I had not planned much when I started as I felt there was not much planning to do but having started filming without planning I found that I had so much footage that would not particularly be of any use to me. This was when I decided that I would be much more particular with what I shot and so decided that I wanted to visit the area surrounding The Custard Factory for it's grittiness and graffiti. I also planned certain shots within my bedroom mainly the different angles used, I intended to just use static camera shots for within my bedroom but then decided to incorporate some handheld footage as it worked so well within the art galleries and other locations. I also decided that I would use different angles rather than just an eye level angle so decided to incorporate some canted angles as well as high angles.
Thursday, 3 December 2015
Wednesday, 11 November 2015
Design Brief
Having researched new waves and analysing three American new wave films it is clear that they share a common theme in that they are about the rejection of everything that came before, whether that be with social issues or actual filming techniques. I specifically looked at the American new wave and found that they spoke strongly about social issues like the Vietnam war and equal rights, the youth were known for there counterculture attitude, listening to psychedelic rock and taking drugs.
I plan to film at established location such as museums, shopping centres and galleries, as well as in a bedroom. I will be using natural lighting for all my footage as I want my audience to be very much aware that they are watching a film. The main action will be the shots from the bedroom, with footage from established locations layered over the top with a low opacity, so it can be seen but only a little.
I plan to intercut all of the scenes randomly with each other to make the film void of any strict narrative, I will be using jump cuts to create jarring transpositions, this will also make the audience more aware that they are watching film. The main sound used within the film will be the non-diegetic backing music, I will also be using little bits of diegetic sound, just a few lines hear and there, these will be recorded using the camera's microphone and so will be bad quality but I feel like this supports my aim of wanting the audience to be aware they are watching a film. I also want my subject to be very much aware they are being recorded, there is no problem with my subjects looking at the camera whenever they feel like it and direct references like waving at or talking to the camera.
I plan to film at established location such as museums, shopping centres and galleries, as well as in a bedroom. I will be using natural lighting for all my footage as I want my audience to be very much aware that they are watching a film. The main action will be the shots from the bedroom, with footage from established locations layered over the top with a low opacity, so it can be seen but only a little.
I plan to intercut all of the scenes randomly with each other to make the film void of any strict narrative, I will be using jump cuts to create jarring transpositions, this will also make the audience more aware that they are watching film. The main sound used within the film will be the non-diegetic backing music, I will also be using little bits of diegetic sound, just a few lines hear and there, these will be recorded using the camera's microphone and so will be bad quality but I feel like this supports my aim of wanting the audience to be aware they are watching a film. I also want my subject to be very much aware they are being recorded, there is no problem with my subjects looking at the camera whenever they feel like it and direct references like waving at or talking to the camera.
Tuesday, 10 November 2015
Shutter Speed
In photography, shutter speed is the length of time when the film or digital sensor inside the camera is exposed to light. The amount of light that teach the film or image sensor is proportional to the exposure time. 1/500th of a second will let half as much light in as 1/250th. Slower shutter speeds are often selected to suggest movement in a still photograph of a moving subject, whilst excessively fast shutter speeds can cause a moving object to appear unnaturally frozen.
This is a short video to show the recording quality of a fast shutter speed. This was recorded using a shutter speed of 1/100th of a second.
Shutter Speed 30 from Jakob Morrison on Vimeo.
This is a short video to show the recording quality of a slow shutter speed. This was recorded using a shutter speed of 1/30th of a second.
Process
The two short videos produced are effective in showing the difference between a fast and slow shutter speed. I struggled at first cause I was unsure on what to film.
Problem Solving
As I have said I was unsure on what to film when I started but when I realised that I just need to get it done to show that I know the difference between shutter speeds. With this in mind I decided to film me spinning around so it was me moving rather than the object I was filming.
Justification of Decisions
See below each video
Recommendations
If I was to re-shoot this task then I would definitely capture a moving subject like a river or fountain, as I feel this would demonstrate the difference between fast and slow shutter speed much more effectively.
Thursday, 5 November 2015
Health and Safety
Before filming, health and safety of the public and crew must be considered, this is incredibly important to do because an injury to crew or public can result in a film being delayed, going over budget or being scrapped entirely. Therefore potential risks must be considered such as the weather, location aspects and members of the public.
When filming, the floor conditions must be taken into account at all times, ensuring there aren't any objects that could result in a person slipping over or damaged equipment. All wires must be taped down at all times to ensure that no one will trip over them and hut themselves or damage equipment. When shooting with a tripod, precautions must be taken to ensure that it will not fall over and break anything or hurt someone, when using a tripod, you must be extra aware of other people's workspace so that you do not invade it or that they do not invade yours, this is how accidents happen.
When filming, the floor conditions must be taken into account at all times, ensuring there aren't any objects that could result in a person slipping over or damaged equipment. All wires must be taped down at all times to ensure that no one will trip over them and hut themselves or damage equipment. When shooting with a tripod, precautions must be taken to ensure that it will not fall over and break anything or hurt someone, when using a tripod, you must be extra aware of other people's workspace so that you do not invade it or that they do not invade yours, this is how accidents happen.
When shooting in the photography studio, all wires must be taped down to ensure no one hurts themselves or damages the lighting equipment. Studio lights should always be turned off at the plug when not in use to ensure the bulbs can cool down before being handled as the bulbs can become very hot and could burn someone or potentially break when moved.
Thursday, 15 October 2015
Lighting
This is a short video to show the use of the butterfly effect, it is hard to see the shadow created but it is still effective in showing the technique. The intended effect is a small shadow of a butterfly in flight below the nose.

This is a short video to show the use of the edge effect, this is probably the most effective video in showing the different lighting setup in the studio. The intended effect is to perfectly expose one side of the face whilst the other is wrapped in shadows.


This is a short video to show the use of the rembrandt effect, this is probably this was definitely the hardest to set up out of three different effects I have shown. The intended effect is to create a triangle using shadows underneath one of the eyes.


Three Point Lighting from Jakob Morrison on Vimeo.
This was a short video to display a three point light set-up, this was one of the easier lighting set-ups. The intention of this three point lighting set-up is to make sure the entire subject's face is fairly well lit.


This was a short video to display the use of reflectors, this was one of the easier lighting set-ups. The use of the reflector is obvious as you can see the light travel across the subject's face, the subject's face is much better lit when using the reflector compared to without.

Creating Shadow in an Experimental Set-Up from Jakob Morrison on Vimeo.
This was a short video to display the shadows created using an experimental set-up, this shot definitely displays the shadows we have created with our set-up. I feel like this could have been displayed much better with a range of different experimental set-ups rather than just the one.
This was a short video to display the shadows created using an experimental set-up, this shot definitely displays the shadows we have created with our set-up. I feel like this could have been displayed much better with a range of different experimental set-ups rather than just the one.

Low-key Lighting from Jakob Morrison on Vimeo.
This was a short video to display low-key lighting. This is a simple lighting effect but can be used in so many situations to convey meaning. I would perhaps re-shoot this shot because I feel like my low-key lighting video looks like a poor attempt at the edge effect.

This was a short video to display low-key lighting. This is a simple lighting effect but can be used in so many situations to convey meaning. I would perhaps re-shoot this shot because I feel like my low-key lighting video looks like a poor attempt at the edge effect.
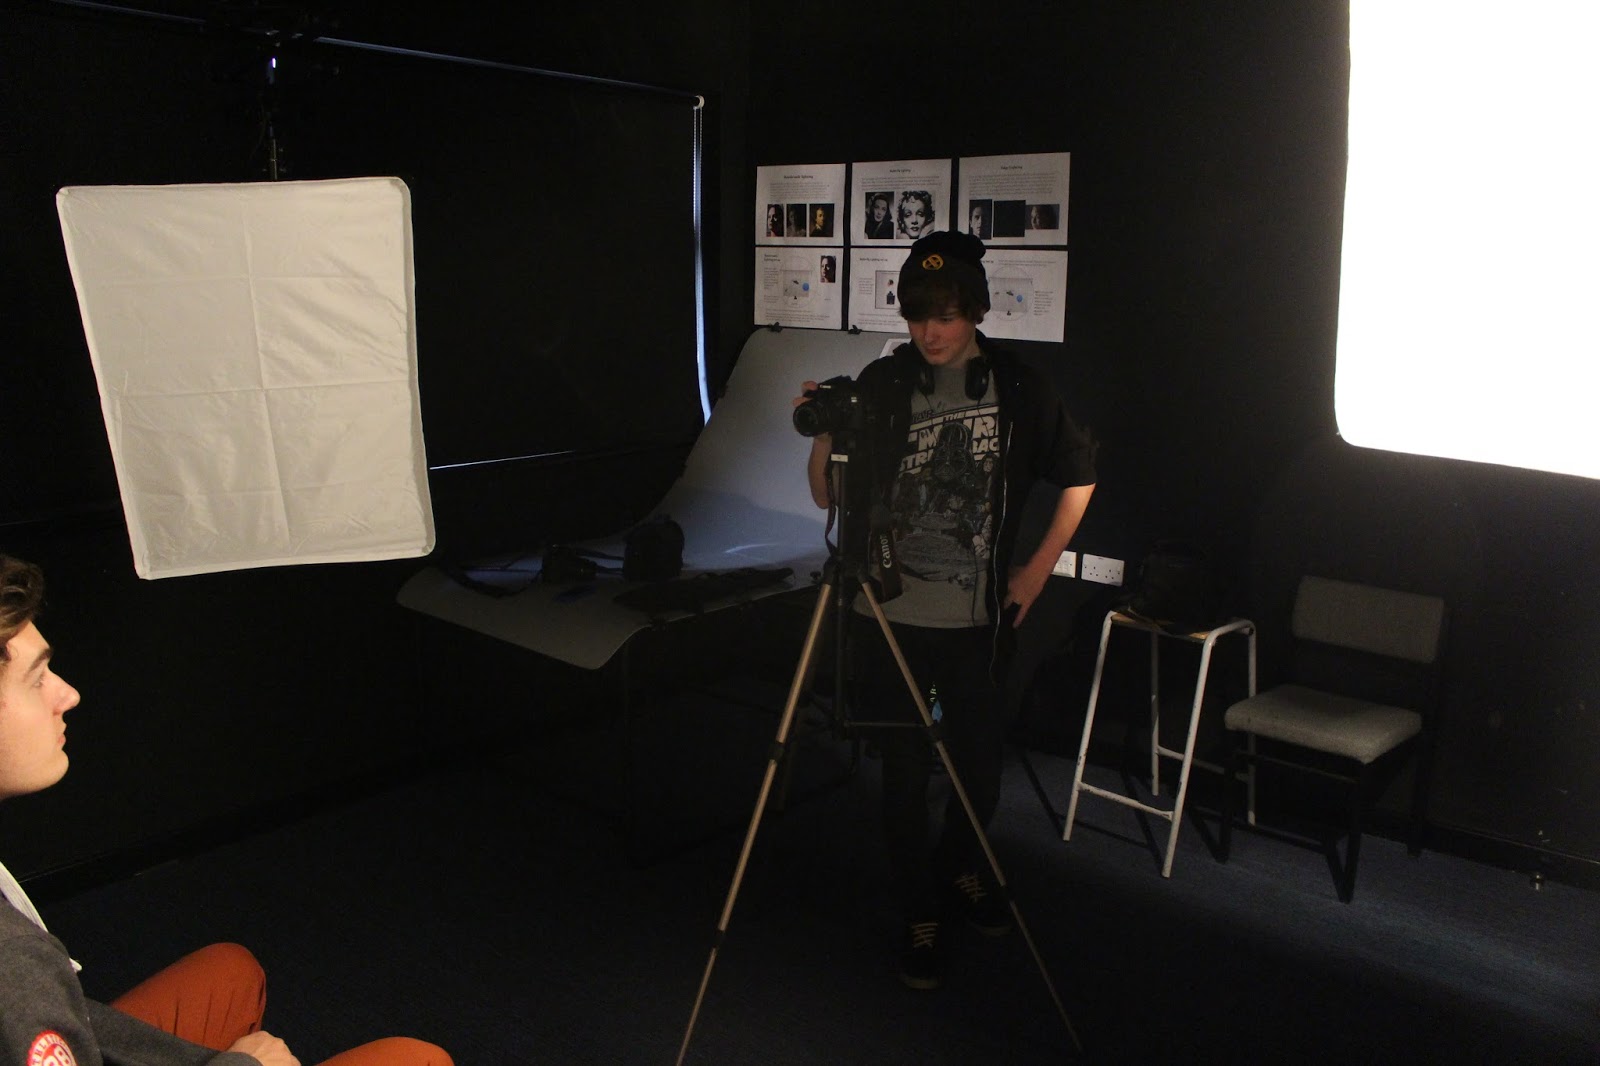
High-key Lighting from Jakob Morrison on Vimeo.
This was a short video to show high-key lighting. This is another simple lighting effect but again but can be used in many different situation to convey meaning.

This was a short video to show high-key lighting. This is another simple lighting effect but again but can be used in many different situation to convey meaning.

Process
The numerous shots produced are effective in showing the different uses of lighting. I struggled with this at first as i was unsure on how to set up the stdio lights to create effects like rembrandt, butterfly and edge.
Problem Solving
As I have said I was unsure on how to set up the studio lights to effectively display the different effects but trying out different lighting positions and researching the effects meant that in the end we had the lights positioned correctly for the shots.
Justification of Decisions
See below each video
Recommendations
I would definitely try to create shadows in a different experimental set-up as although he shits works well I feel like could have been more experimental with it if I had fully applied myself.
Monday, 5 October 2015
Aperture
f2.8 moving from Jakob Morrison on Vimeo.
This was shot with an aperture of f2.8, the foreground is in focus but the background is completely out of focus, as the subject moves towards the camera he gradually comes into focus, I felt like this shot displayed just how shallow the depth of field is when using an aperture of f2.8
f2.8 from Jakob Morrison on Vimeo.
This was shot with an aperture of f2.8, as you can see the foreground is in focus but the background is completely out of focus. The shot using an aperture of f8 looks almost completely in focus when compared to this shot.
f22 from Jakob Morrison on Vimeo.
This was shot with an aperture of f22, as you can see both the foreground and background are in focus. Comparing this shot to that using an aperture of f8 really allows you to see just how deep the depth of field is when using an aperture of f22.
f8 Standard Lens from Jakob Morrison on Vimeo.
This was shot with an aperture of f8 using a standard lens, as you can see the foreground is in focus but the background is slightly more blurred and out of focus. The difference between the foreground and background is nothing in comparison to that caused by an aperture of f2.8
Process
The numerous shots produced are effective in showing the difference between differing aperture settings. I struggled with this at first and wasn't entirely sure how to change the aperture and wasn't entirely sure I had done it right.
Problem Solving
I found that some of my shots were under exposed as the aperture had been increased meaning less light was reaching the lens, to combat this I increased the ISO, which increased the camera's sensitivity to light and as such meant the final shots produced were exposed correctly.
Justification of Decisions
See below each video
Recommendations
If I was to reshoot, I would definitely use rack focus within my video to change the focus from the foreground to the background as I feel this would have demonstrated the effect on using different apertures more effectively.
The Conversation
The Conversation from Jakob Morrison on Vimeo.
Process
The final video produced is pretty well made considering we had roughly four hours to plan, film and edit the piece. I believe it shows a mixture of the techniques we have learnt so far including lighting, focus, and editing skills. I struggled working in a group as we are all unorganised people and a mix of this really doesn't go down well with such a short time frame. However, we managed to save the final video through the editing which was definitely our biggest strength.
Problem Solving
Working within a group to record our original footage was probably the hardest part of the task mainly because we weren't a very organised team, to combat our team's lack of organisation I essentially took the helm and told the team to go out and reshoot certain shots whilst I started on the editing.
Justification of Decisions
This video was produced to show what kind of thing we can produce within four hours to work, it displays our skills so far and I think with slightly more time we could have shown off what we have learnt a lot more.
Recommendations
To improve this video I would add in some more shots so that it is more obvious what the narrative is actually about, I believe we have done a good job of capturing what we intended but I still feel like the audience wouldn't necessarily decode the preferred reading.
Wednesday, 23 September 2015
Rack Focus
Rack focus is where the focus is changed from one subject to another during a shot.
Process
The final shot produced is fairly effective in showing rack focus. I struggled with this to start with as I was using a camera with a deep depth of field, and I am an amateur when it comes to camera settings.
Problem Solving
The main problem I faced with this task was the fact the camera had such a deep depth of field but after experimenting with the aperture I managed to get the right shot. Increasing the aperture lead to a shallow depth of field which allowed me to use rack focusing efficiently.
Justification of Decisions
At the start of this shot the sign on the door in the background is in focus, the focus then shifts to the hand in the foreground before shifting focus back to the sign in the background. The sign on the door was readily available and then placing the hand close to the lens meant I could easily shift the focus between the two to show rack focus efficiently.
Recommendations
To improve this video, I would use a higher aperture so that I had a shallower depth of field. I would also use different subjects because I feel like two people, one in the foreground and one in the background, would allow me to show the technique of rack focusing more efficiently.
ISO Tests
The purpose of this task was try out different ISO settings and make sure the shot was still exposed correctly. I used both ISO 100 and 1600, shot both at night and during the day.
Day
ISO 100
For this first shot, I used ISO 100 but my aperture was too high causing the shot to be over exposed.
This was shot in ISO 100, I had to make sure my subject was exposed correctly which was difficult because he was standing in front of the light source, the sun.
This shot also used ISO 100, but the whole shot is exposed well, because this time my subject isn't blocking out my light source.
ISO 1600
This shot was done inside and I used ISO 1600, this can be seen by the quality of the footage compared to the three shots with ISO 100, the image appears quite grainy.
Night
ISO 100
This shot was done at night, clearly, and I used ISO 100, this meant that the shot was barely visible but it is better quality than the ISO 1600 shot
ISO 1600
This shot was done at night, clearly, and I used ISO 1600, I have repeated the same shot I used ISO 100 for, to show the clear difference in exposure.
This shot was done at night, clearly, and I used ISO 1600, this meant that the shot was actually visible but again the image appears a little grainy.
Process
The numerous shots produced are effective in showing the difference between differing ISO settings at both daytime and nighttime. I struggled with this at first and wasn't entirely sure how to make sure a shot was exposed correctly.
Problem Solving
When filming outdoors during the day, I found my shot was over exposed because I hadn't adjusted the aperture correctly, when I realised this I re-shot the shot, I increased the f-number which allowed less light to reach the lens.
Justification of Decisions
See below each video
Recommendations
If I was to reshoot the shots at night I would use another source of light especially the ones where ISO 100 was used because the subject can barely be seen, I would have also tried to do more of an aesthetic shot, with complete darkness and one source of light directly next to the subject as they move.
Sunday, 20 September 2015
Basic Shot Types Video Essay
Basic Shot Types from Jakob Morrison on Vimeo.
Process
The final video produced is fairly effective in showing and explaining different shot types. I struggled with this to start with because I was unsure on how to go about the task but once I had an idea of what I wanted my final video to be like I hit the road and didn't look back.
Problem Solving
Working within a group to record our original footage was probably the hardest part of the task mainly because we weren't a very organised team, to combat our team's lack of organisation I filmed a few shot in my own time.
Justification of Decisions
This video was produced to show the basic shot types with a brief explanation for each shot. I have provided my own example as well as a cinematic example to show why such a shot type might be used when.
Recommendations
I would definitely re-shoot the high angle shot, the tracking shot and the dreaded reverse zoom dolly, the example given was terrible and as such I provided the best cinematic example I could think of, the classic Jaws zolly shot. I would also cut down my cinematic example of the extreme close-up because it is slightly too long, although i feel this makes my audience uncomfortable just as the extreme close-up was intended to do.
Cinematic Examples:
Anchorman
Jurrasic World
Iron Man
Jaws
La Haine
The Amazing Spider-Man 2
Spider-Man
Blair Witch Project
Iron Man 2
Fish Tank
Microphone Tests
We tested out different microphones to see their recording ability
The first microphone we used was the built in microphone on the Canon, as you can hear this a very grainy sound and isn't very clear, this is why the built in microphone should never really be used, especially with the other choices of microphone available. This kind of microphone also has an omnidirectional polar pattern meaning that it picks up sound from all directions.
The first microphone we used was the built in microphone on the Canon, as you can hear this a very grainy sound and isn't very clear, this is why the built in microphone should never really be used, especially with the other choices of microphone available. This kind of microphone also has an omnidirectional polar pattern meaning that it picks up sound from all directions.
Another microphone we used was the shotgun microphone, attached to a boom pole, this provided us with the best sound quality, and due to the microphone being cardioid sound is only picked up from the front of the mic.
The final microphone we tested was the Zoom H1 microphone, this was good quality and had also detected sound in stereo, this is why the subject is moving from left to right, the difference in sound cannot really be picked up in this video but would be more prominent in footage where the moved slowly from side to side.
Wednesday, 16 September 2015
Aperture, Shutter Speed and ISO
Aperture

Shutter Speed
The photograph on the right was taken with a slower shutter speed than that of the left, this creates a motion blur effect with longer streaks of light from vehicle headlights.

The aperture stop of a photographic lens can be adjusted to control the amount of light reaching the film or image sensor. The aperture size regulate the film or image sensor's exposure to light. Lens aperture is usually specified as an f-number, this diagram demonstrates what the f-number actually is, as the f-number increases the diameter of the entrance pupil decreases and as such less light reaches the lens. The size of the aperture stop also affects depth of field, larger f-numbers produce a longer depth of field, allowing objects at a wide range of distance to all be in focus at the same time. [1]

Shutter speed is the length of time a camera's shutter is open when taking a photograph, shutter speed in combination with aperture regulates the film or image sensor's exposure to light. [2] To freeze fast moving objects such as a fast flowing river a very short shutter speed would be used, whereas a very long shutter speed could be used to intentionally blur a moving subject for artistic effect. [3]


ISO

The ISO setting refers to the camera's sensitivity to light, the higher the ISO, the more sensitive it is. ISO is actually measure according to international standards so ISO100 on one camera will be the same as another. ISO increases by doubling the previous ISO, this will also double the camera's sensitivity to light.
This image perfectly shows the ISO scale and when ISO might need to be adjusted. [5]
[1] Gibson, H. Lou. 1975. Close-Up Photography and Photomacrography. 2nd ed. Kodak Publication.
[2] Sidney F. Ray. 2000. Manual of Photography: A Textbook of photographic and Digital Imaging. 9th ed. Focal Press.
[3] Frost, Lee. 2000. The Complete Guide to Night and Low-Light Photography. Amphoto Books.
[4] Stansfield, Andy. 2011. Understanding Exposure The Expanded Guide. Ammonite.
[5] www.digitalcameraworld.com
Wednesday, 9 September 2015
Induction Task Two
In this clip, I have decreased the aperture to allow more light to reach the lens, the glare from the bulb is due to the aperture being incredibly low, it looks dreadful because I have no idea what I'm doing with a camera.

This diagram demonstrates what the f number actually is, as the f-number increases the diameter of the entrance pupil decreases and as such less light reaches the lens.
I have changed the kelvin white balance in this shot, ranging from 1500K to 15000K, this has increased the warmth of the image, and at the very end of the clip, it reverts back to the original white balance I started with, this is a much colder shot, again I wasn't entirely sure of what I was doing and as such the video looks dreadful.
In this clip, I have changed the ISO, which changes the lens' sensitivity to light, this can clearly be seen but I feel like again I don't particularly have a clue what i'm actually doing.
Induction Task
Lighting can affect the image produced to a large extent, this can be due to the strength and direction, among many other things. One such way lighting can affect an image is that of the exposure, exposure simply put is the amount of light that reaches a photographic film or image sensor. This can be determined by shutter speed, which is simply the length of time a camera's shutter is open when taking a photograph. (Ray, 2000) Slower shutter speeds are often selected to suggest movement in a still photograph of a moving subject. Excessively fast shutter speeds can cause a moving subject to appear unnaturally frozen.
Lens aperture also affects exposure, the aperture is the ratio of the lens's focal length to the diameter of the entrance pupil. (Smith, 2007) Depth of field increases as aperture decreases, image sharpness is related to aperture through aberration, due to imperfect lens design, and diffraction which is due to the wave nature of light. (Langford, 2000)
One use of lighting within moving image is to manipulate the shape and direction of shadows. Strong direct light produces dark, well-defined shadows whilst directionless diffused light produces weak, soft shadows. Lighting coming from behind the camera is called front lighting but the image produced will lack detail or provide an impression of depth. To give an impression of form, depth and texture to the subject, the light should be coming from a different angle. (NAVPERS, 1951)
Changing the direction of your lighting results in in the shadows changing position too, for images in which rendering texture is important, side lighting is ideal. It produces harsh shadows and high contrast, which can be adjusted using reflectors or fill-in flash. Another light positioning commonly used is that of back lighting, this produce will have a silhouette effect on the subject but reflectors or fill-in flash to brighten up dark shadows and improve subject detail. (NAVPERS, 1951)
Lighting can be used in a manner of different ways to produce different effects, the above are only example in a large range of techniques that can be used to produce the perfect image needed. I have not fully explored lighting because I did not manage my time well but I feel the research done helped me produce the videos in the end.
Sidney F. Ray, 2000. "Camera Features". In Ralph Eric Jacobson et al. Manual of Photography: A Textbook of Photographic and Digital Imaging. 9th Ed. Focal Press.
Smith, Warren, 2007. Modern Optical Engineering. 4th Ed. McGraw-Hill Professional
Michael John Langford, 2000. Basic Photography. Focal Press.
NAVPERS, 1951. Photography Navy Training Courses Vol 1. Bureau of Navel Personnel
Lens aperture also affects exposure, the aperture is the ratio of the lens's focal length to the diameter of the entrance pupil. (Smith, 2007) Depth of field increases as aperture decreases, image sharpness is related to aperture through aberration, due to imperfect lens design, and diffraction which is due to the wave nature of light. (Langford, 2000)
One use of lighting within moving image is to manipulate the shape and direction of shadows. Strong direct light produces dark, well-defined shadows whilst directionless diffused light produces weak, soft shadows. Lighting coming from behind the camera is called front lighting but the image produced will lack detail or provide an impression of depth. To give an impression of form, depth and texture to the subject, the light should be coming from a different angle. (NAVPERS, 1951)
Changing the direction of your lighting results in in the shadows changing position too, for images in which rendering texture is important, side lighting is ideal. It produces harsh shadows and high contrast, which can be adjusted using reflectors or fill-in flash. Another light positioning commonly used is that of back lighting, this produce will have a silhouette effect on the subject but reflectors or fill-in flash to brighten up dark shadows and improve subject detail. (NAVPERS, 1951)
Lighting can be used in a manner of different ways to produce different effects, the above are only example in a large range of techniques that can be used to produce the perfect image needed. I have not fully explored lighting because I did not manage my time well but I feel the research done helped me produce the videos in the end.
Sidney F. Ray, 2000. "Camera Features". In Ralph Eric Jacobson et al. Manual of Photography: A Textbook of Photographic and Digital Imaging. 9th Ed. Focal Press.
Smith, Warren, 2007. Modern Optical Engineering. 4th Ed. McGraw-Hill Professional
Michael John Langford, 2000. Basic Photography. Focal Press.
NAVPERS, 1951. Photography Navy Training Courses Vol 1. Bureau of Navel Personnel
Subscribe to:
Posts (Atom)